
Introduction
Running inline JavaScript can be a powerful way to extend your workflows. This guide will walk you through the steps to set this up in Power Automate via a custom connector for an Azure Function.
Step 1: Create an Azure Function
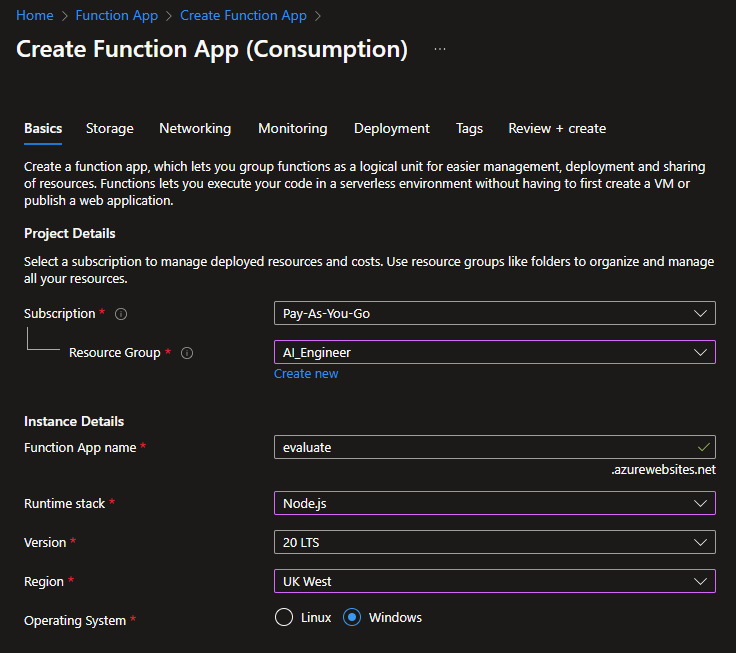
1. Log in to the Azure Portal: Go to Azure Portal (https://portal.azure.com). 2. Create a new Function App: Navigate to "Create a resource" > "Compute" > "Function App". 3. Configure your Function App: - Subscription: Choose your subscription. - Resource Group: Create a new resource group or select an existing one. - Function App name: Enter a unique name. - Runtime stack: Select "Node.js". - Region: Choose a region close to you. 4. Review and create: Review your settings and click "Create".
Step 2: Develop the Azure Function
1. Navigate to your Function App: Once created, go to your Function App. 2. Create a new function: Click on "Functions" > "Add" > "HTTP trigger". 3. Configure the function: - Name: Give your function a name. - Authorization level: Choose "Function". 4. Write your JavaScript code: Replace the default code with this:
module.exports = async function (context, req) { context.res = { body: {}, headers: { "content-type": "application/json" } }; if (!req.body || typeof req.body !== "string") { context.res.status = 400; context.res.body = { error: "Invalid input" }; return; } try { const result = new Function(req.body)(); context.res.body = { result }; } catch (e) { context.res.status = 400; context.res.body = { error: e.message }; } };5. Save and test: Save your function and test it using the "Test/Run" feature.
Step 3: Create a Custom Connector in Power Automate
1. Log in to Power Automate: Go to Power Automate (https://flow.microsoft.com). 2. Create a new custom connector: - Navigate to "Data" > "Custom connectors" > "New custom connector" > "Create from blank". 3. Configure the custom connector: - General: Enter a name and description. - Scheme: HTTPS - Host: Enter the base URL of your API Management instance. - Security: API key
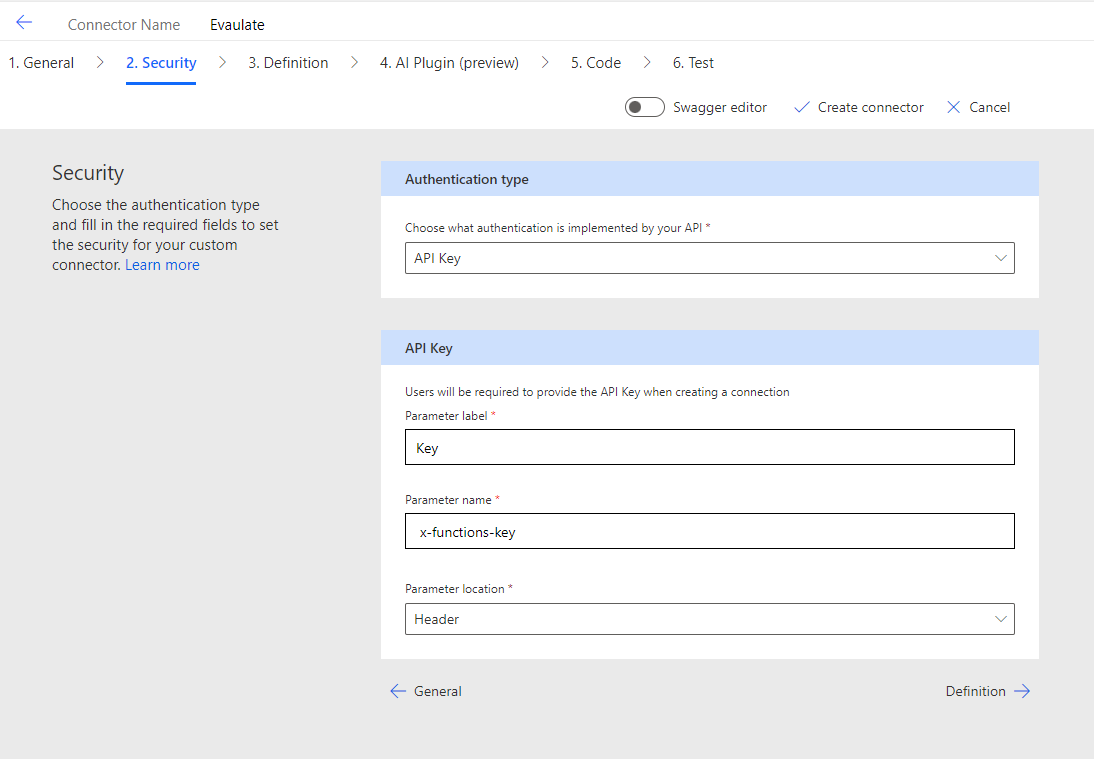
- Definition: New Action
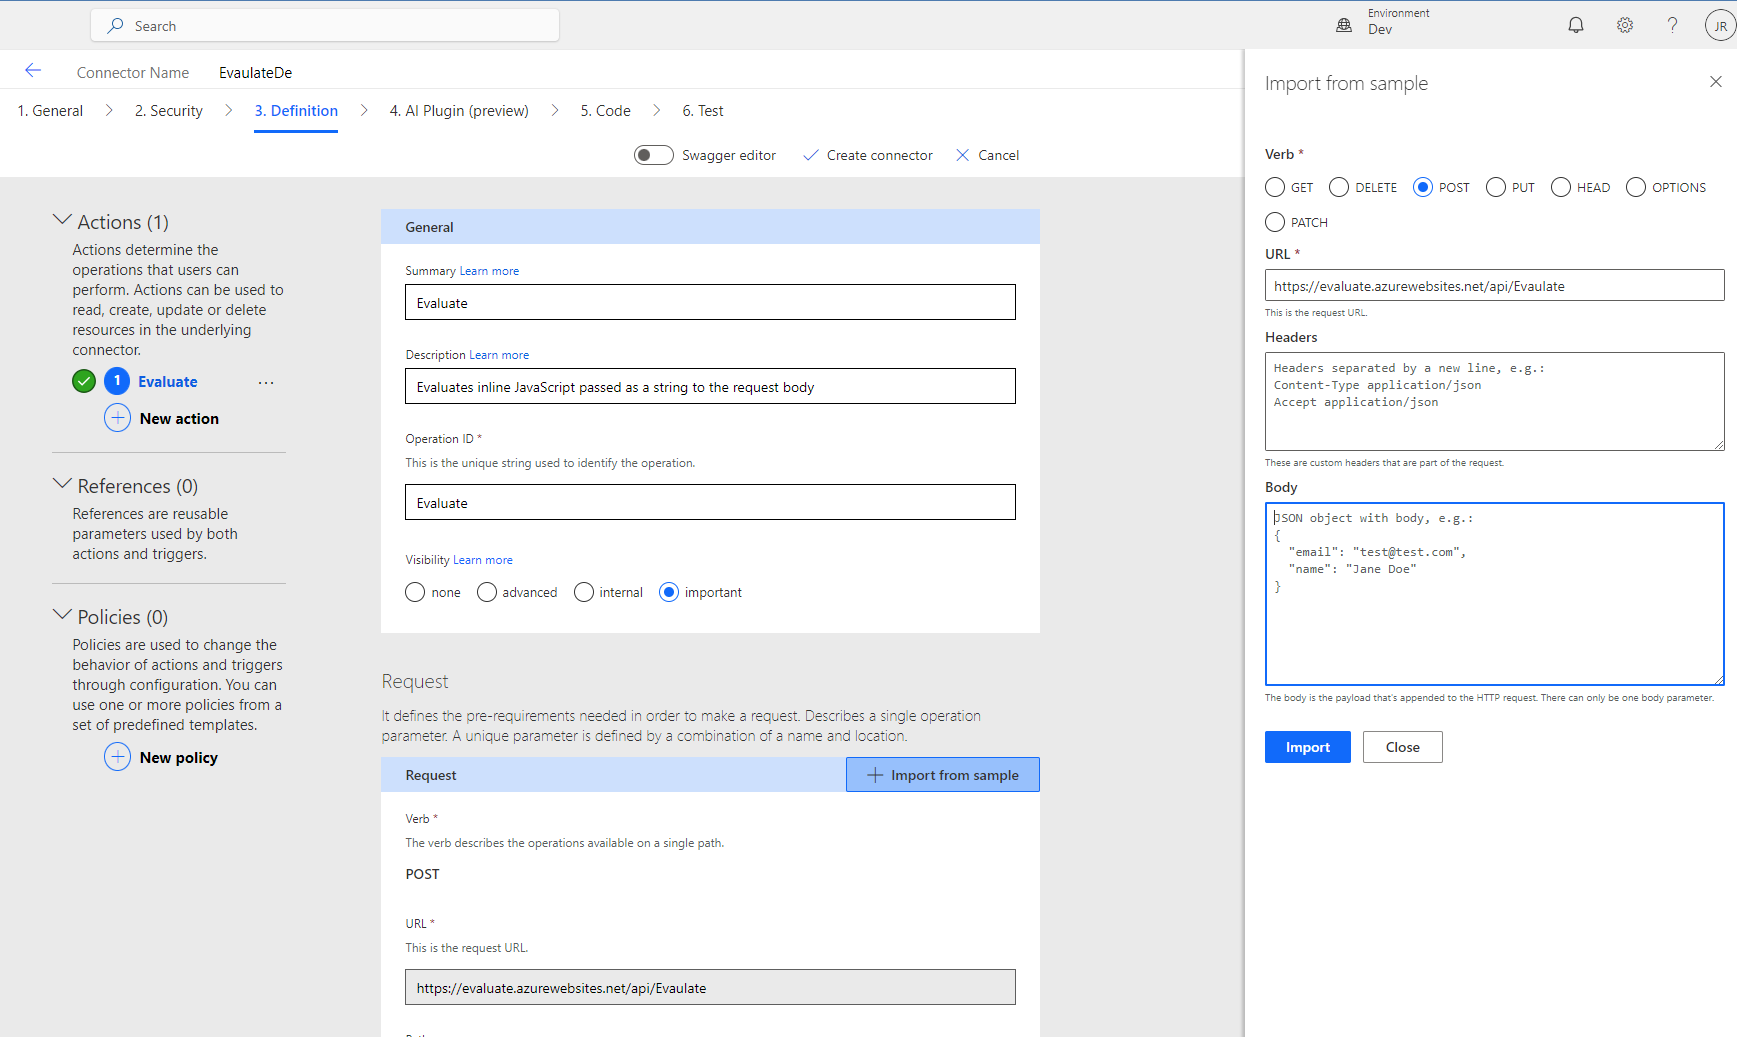
- Summary: Evaluate - Description: Evaluates inline JavaScript passed as a string to the request body - Visibility: important
- Request: Import from sample
- Verb: POST - URL: Your function URL - Import
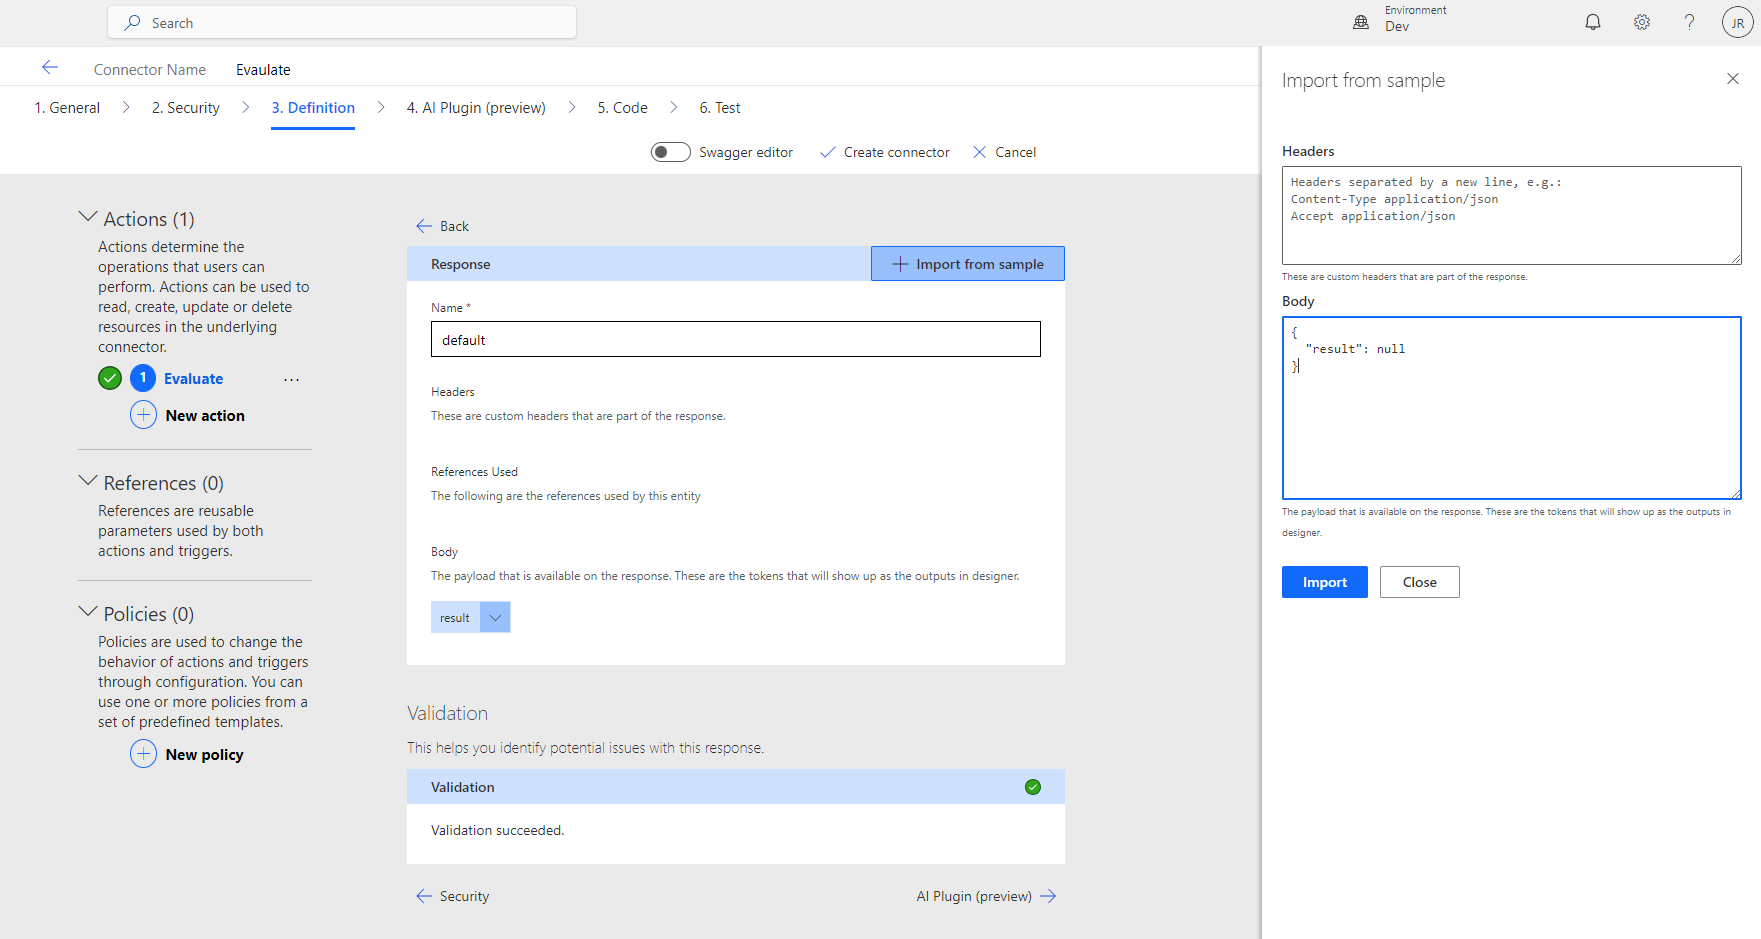
- Response: default > Import from sample
- Body: { "result": null }
- Swagger editor: paste the following into the parameters section of the /Evaluate path:
parameters: - name: script in: body required: true schema: type: string- The completed swagger should look as follows:
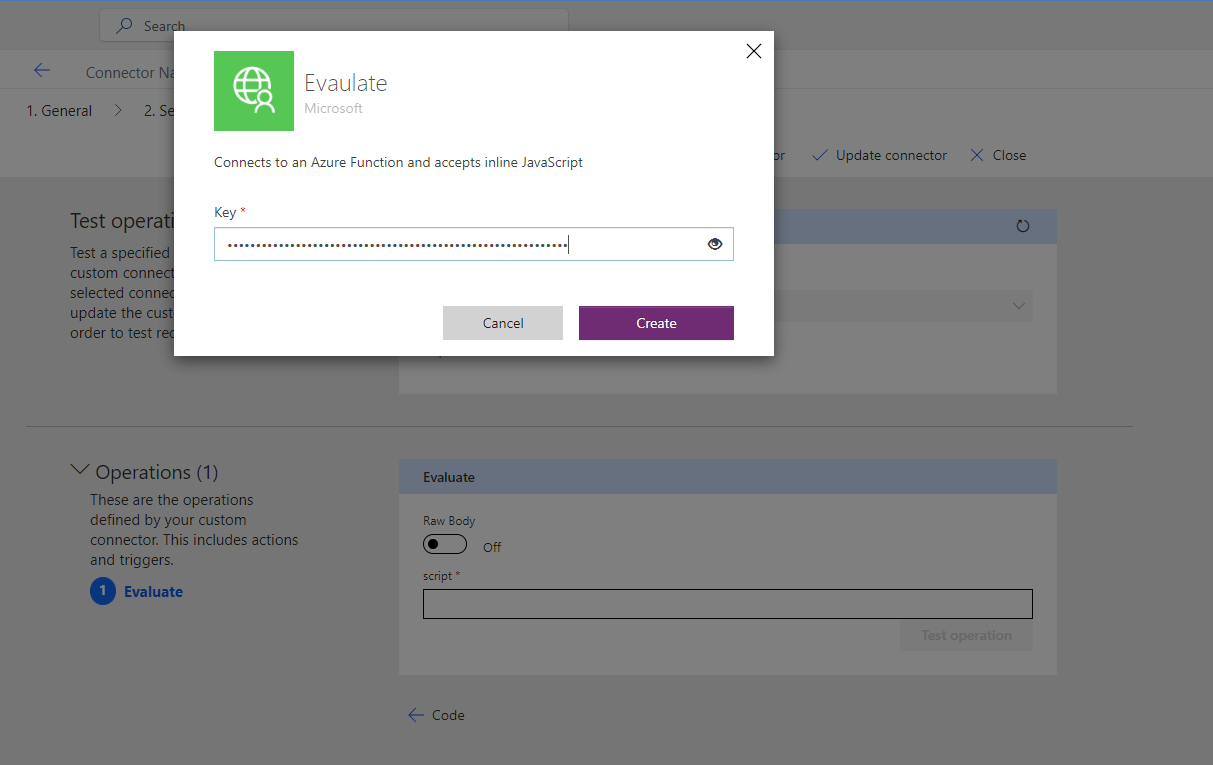
swagger: "2.0" info: title: Evaulate description: Connects to an Azure Function version: "1.0" host: <your base url> basePath: /api schemes: - https consumes: [] produces: [] paths: /Evaulate: post: responses: default: description: default schema: type: object properties: result: type: string description: result title: result summary: Evaluate description: Evaluates inline JavaScript passed as a string to the request body operationId: Evaluate x-ms-visibility: important parameters: - name: script in: body required: true schema: type: string definitions: {} parameters: {} responses: {} securityDefinitions: Key: type: apiKey in: header name: x-functions-key security: - Key: [] tags: []1. Create Connector 2. Create a Connection: Add New Connection > Key > Create
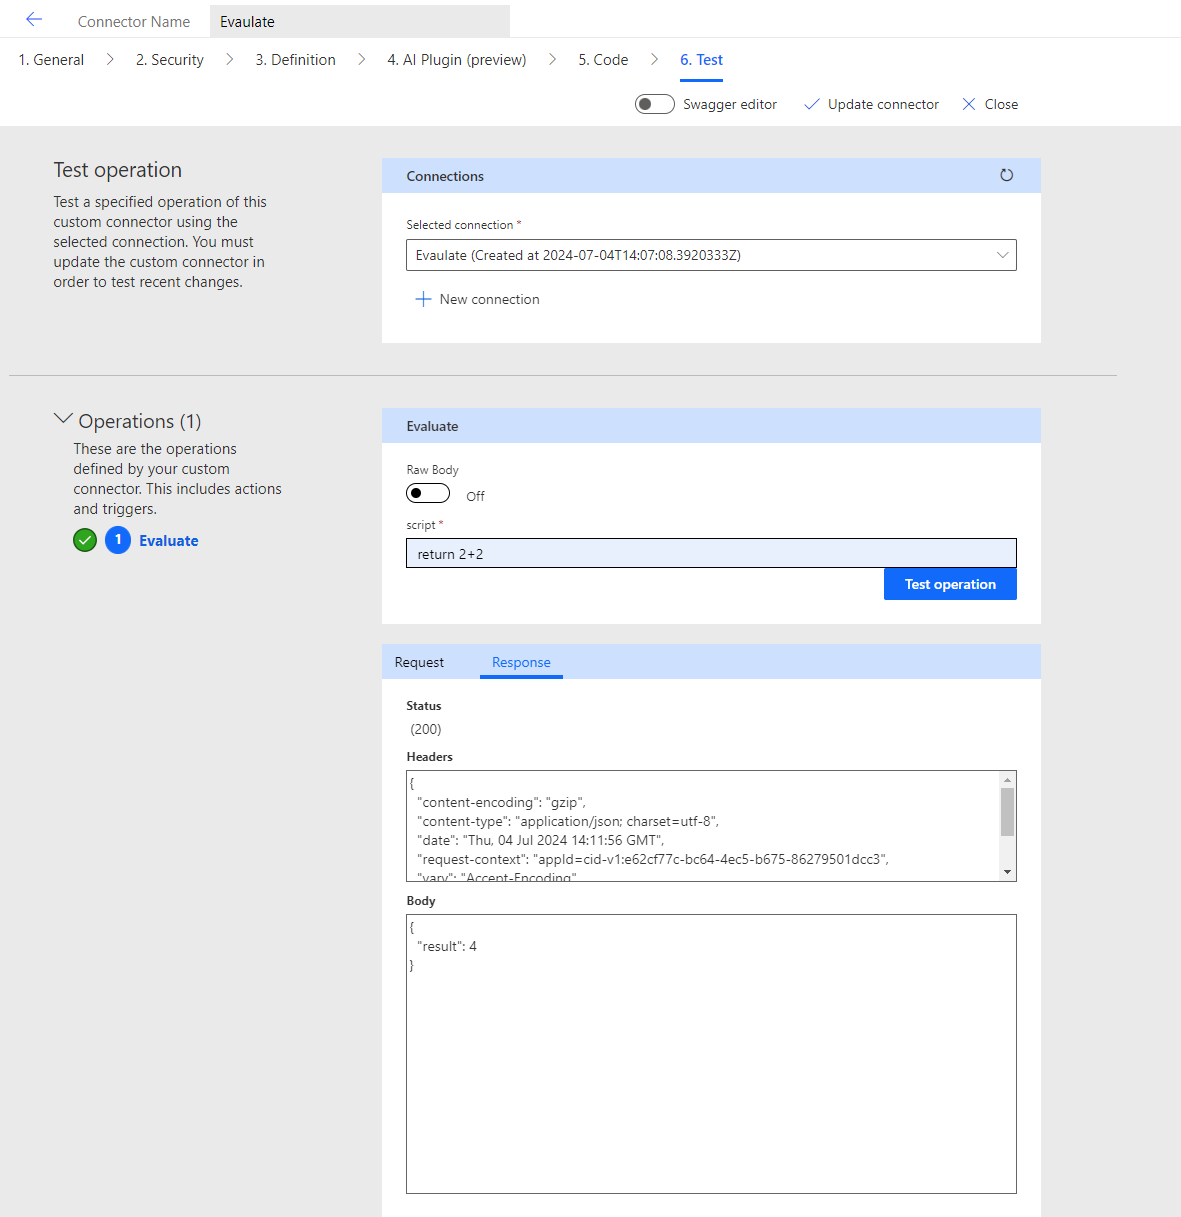
3. Test the connector: script > return 2+ 2 > Test operation
Step 4: Use the Custom Connector in a Flow
1. Create a new flow: Go to "My flows" > "New flow". 2. Add a trigger: Choose a trigger to start your flow. 3. Add an action: Search for your custom connector and add the action you defined. 4. Configure the action: Enter any required parameters. 5. Save and test the flow: Save your flow and test it to ensure it runs correctly.
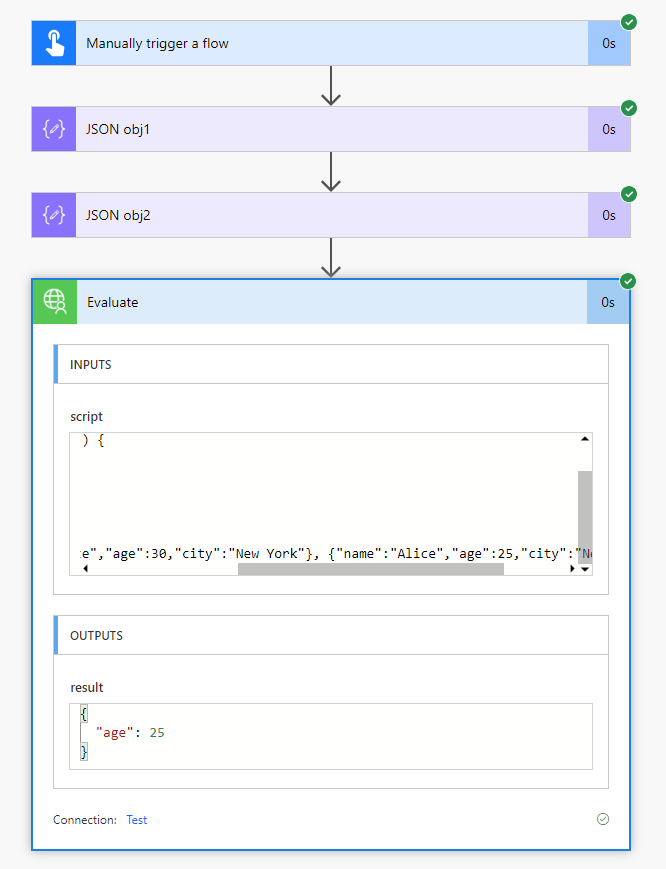
By following these steps, you can run JavaScript via a custom connector for an Azure Function in Power Automate, enabling you to create powerful and flexible workflows.


No comments yet