
What is a Catch block?
A Catch block is part of the Try-Catch-Finally pattern used in programming to handle errors gracefully. In Power Automate, the Catch block allows you to manage exceptions and errors that occur during the execution of your flow. By using a Catch block, you can ensure that your flow continues to run smoothly even when something goes wrong.
Step 1: Configure the Try block
1. Open Power Automate and create a new flow. 2. Insert a Scope action to group the actions you want to monitor for errors and name it "Try". 3. Inside the Scope, add the action that might fail (it needs to involve a network request). 4. Enable Static Result (Preview) on the action and set the Status to "Failed". This will force an error in the "Try" Scope.
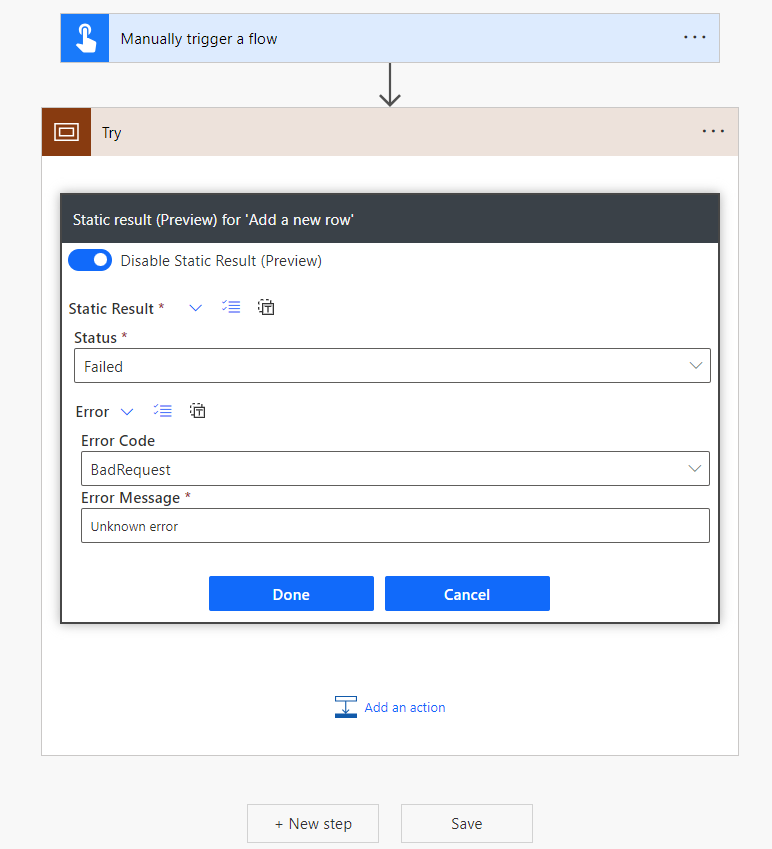
5. Add a second Scope action below the "Try" Scope and name it "Catch".
Step 2: Configure the Catch block
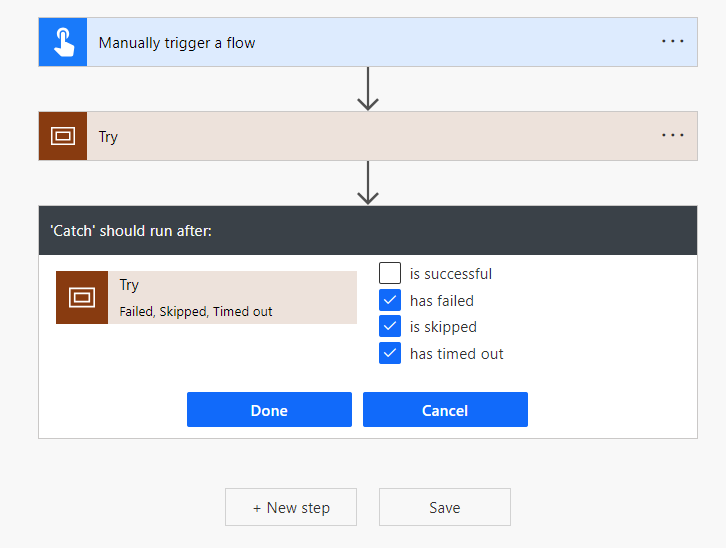
1. Click on the ellipsis (three dots) of the "Catch" Scope and select Configure run after. 2. Check the boxes for has failed, is skipped and has timed out. This ensures that the Catch block runs only if the Try block fails.
Step 3: Extract error details from the Try block
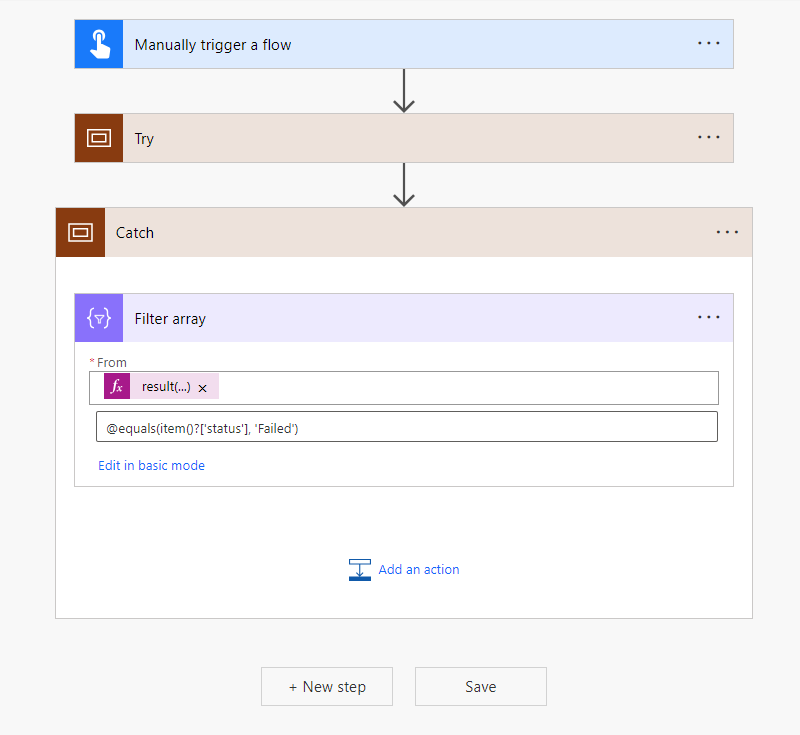
1. Use the Filter array action to extract the error details from the result of the Try block, using result('Try') , where the status is equal to Failed @equals(item()?['status'], 'Failed').
2. Use the Select action to extract the following properties from the Body of the Filter array action:
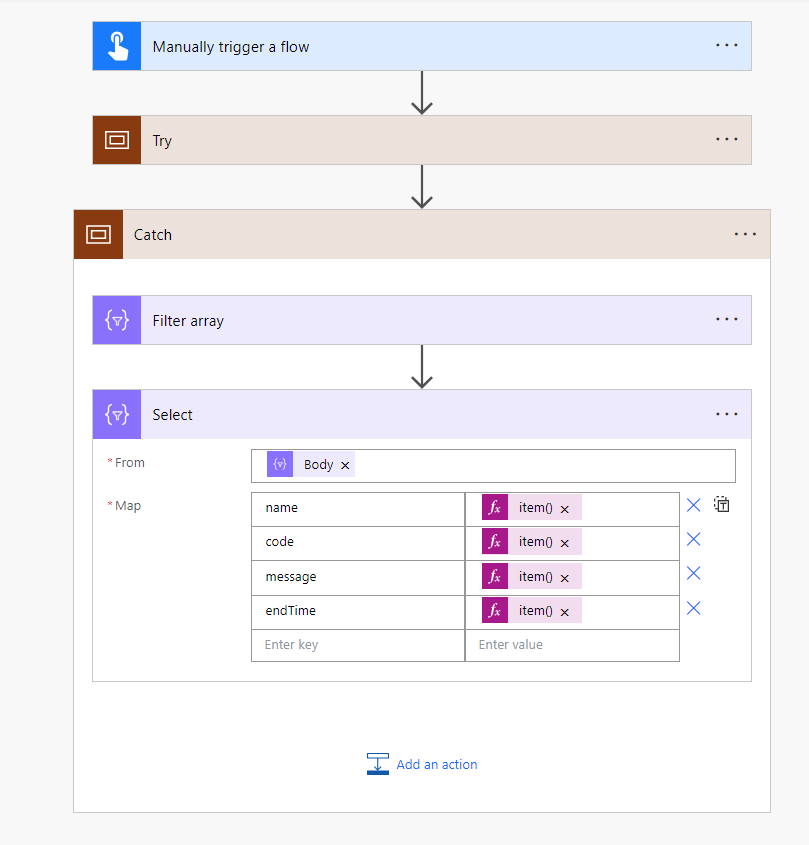
{ "name": @{item()?['name']}, "code": @{item()?['error/code']}, "message": @{item()?['error/message']}, "endTime": @{item()?['endTime']} }3. Add a Compose action to build the flow run URL. Use the following expression:
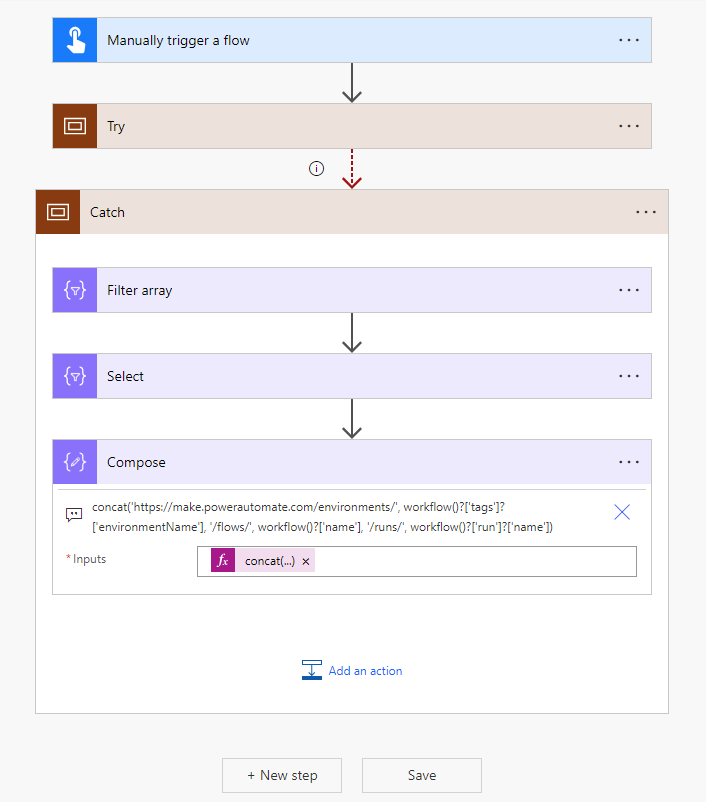
concat('https://make.powerautomate.com/environments/', workflow()?['tags']?['environmentName'], '/flows/', workflow()?['name'], '/runs/', workflow()?['run']?['name'])4. Use the Send an email (V2) action to notify the relevant person/team/shared mailbox with the following:
1. Subject: @{workflow().tags.flowDisplayName} Flow Failure 2. Body:
<p>Hi,</p> <p>The flow <strong>@{workflow().tags.flowDisplayName}</strong> has failed.</p> <p><strong> Error Summary:</strong></p> Run ID: @{workflow().run.name}<br /> Date and time: @{formatDateTime(parseDateTime(first(body('Select'))?['endTime']), 'dd/MM/yyyy, HH:mm')}<br /> Failed at action: @{first(body('Select'))?['name']}<br /> Code: @{first(body('Select'))?['code']}<br /> Message: @{first(body('Select'))?['message']}<br /> <p>The flow run can be accessed <a href="@{outputs('Compose')}">here</a>.</p>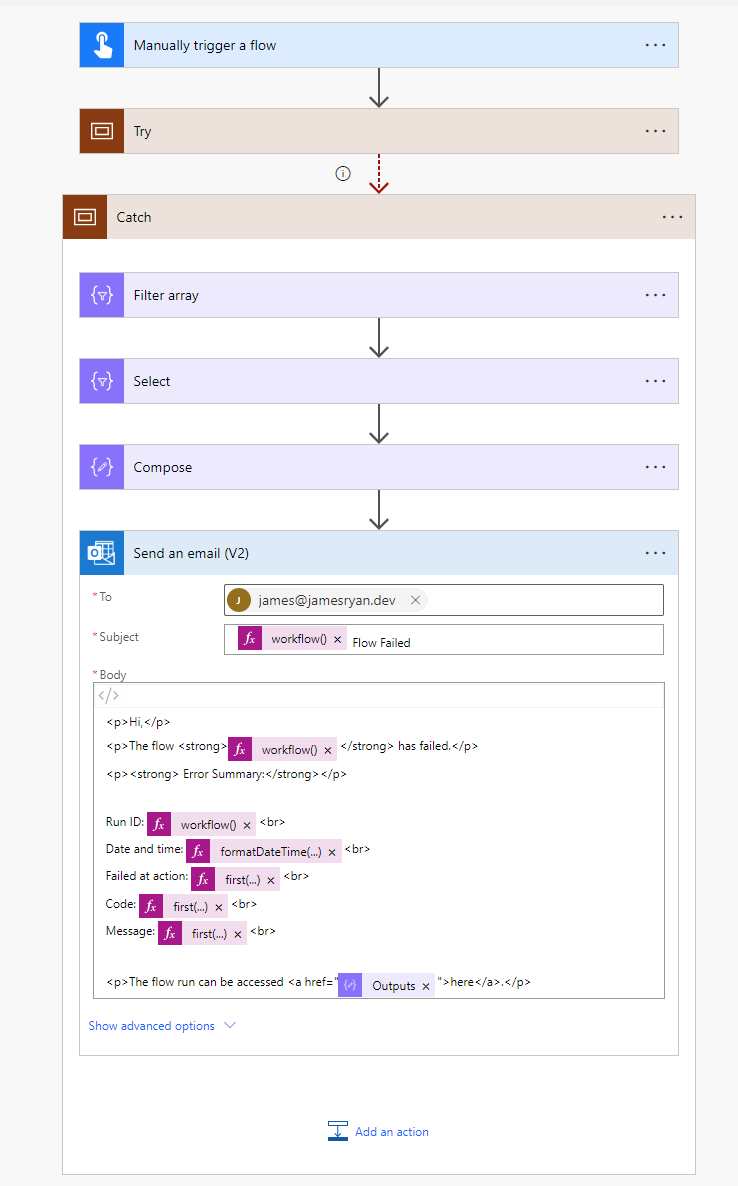
Step 4: Test your flow
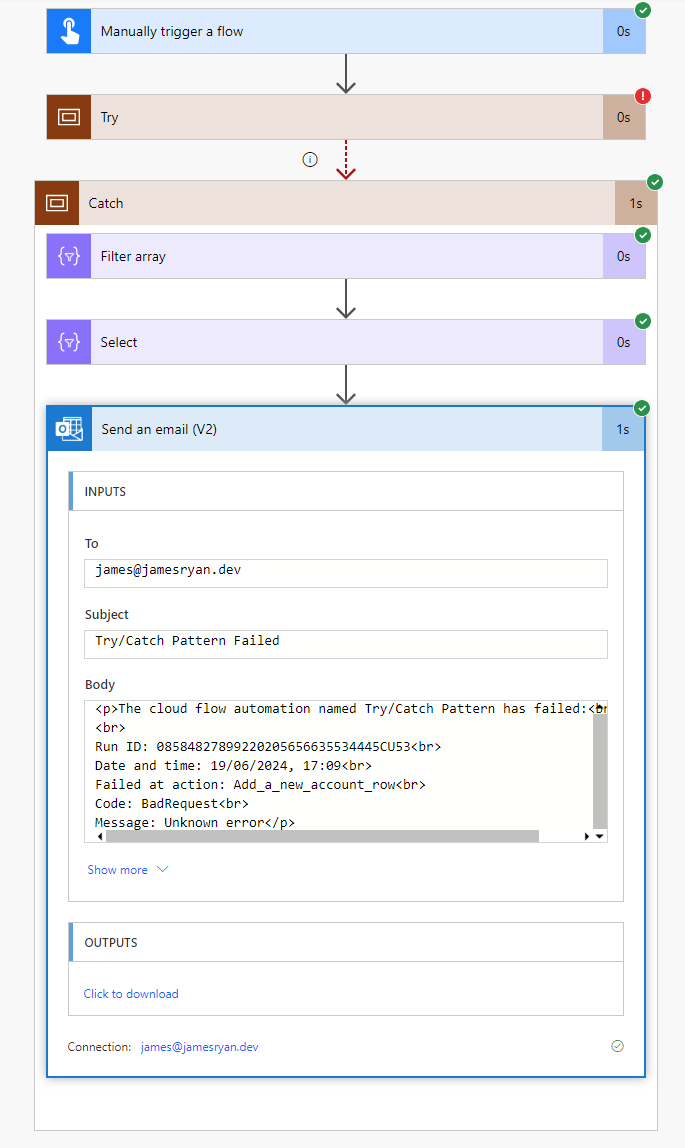
1. Save and test flow. 2. Verify that the flow runs as expected and handles the error.
Conclusion
Creating a child flow to handle the Catch block in Power Automate can make your workflows more robust and easier to manage. By following these steps, you can ensure that your flows handle errors gracefully and continue to run smoothly. Happy automating!


No comments yet